How to Apply DTF Transfers: Step-by-Step Guide for Perfect Prints
berat mersan
How to Apply DTF Transfers: Step-by-Step Guide for Perfect Prints
📑 Table of Contents
▼- 1 Introduction to DTF Transfer Application
- 2 Tools and Materials You'll Need
- 3 Preparing the Garment
- 4 Heat Press Settings for DTF Transfers
- 5 Applying the DTF Transfer
- 6 Hot Peel vs Cold Peel Explained
- 7 Post-Press Steps
- 8 Common Mistakes and How to Avoid Them
- 9 Washing and Care Instructions
- 10 Final Tips for Professional Results
- 11 Conclusion
Introduction to DTF Transfer Application
What Are DTF Transfers?
Direct-to-Film (DTF) transfers represent a revolutionary advancement in garment decoration technology. This modern printing method involves printing designs onto specialized film using high-quality pigment-based inks, which are then transferred onto fabric using a professional heat press machine. Unlike traditional screen printing techniques or sublimation processes, DTF transfers work seamlessly on a wide variety of fabricsincluding 100% cotton, polyester, blends, and even high-performance sportswear materials. This remarkable flexibility makes DTF printing a powerful solution for print shops, apparel brands, custom merchandise creators, and wholesale businesses who need consistently high-quality prints without the need to invest in multiple different print methods or expensive equipment for each fabric type.
Why Proper Application Matters for Business Success
Even the highest-quality DTF transfers available on the market can fail catastrophically if they're not applied using the correct techniques and settings. Common issues such as cracking after a few wears, premature peeling around the edges, rapid fading after just a handful of washes, or poor adhesion that causes the design to lift from the fabric usually trace back directly to improper temperature settings, incorrect pressing time, or inadequate pressure during the application process. Following a reliable, tested step-by-step guide ensures your DTF transfers bond permanently and securely to the fabric fibers, resulting in vibrant colors that pop, smooth professional finishes, and exceptional long-lasting durability that withstands dozens of wash cycles.
From a business and profitability perspective, mastering the correct DTF transfer application process translates directly into fewer wasted materials, consistent print quality across large production orders, and significantly higher customer satisfaction rates. For wholesale buyers, print shop owners, and apparel production facilities, this level of consistency is especially criticalevery second saved during the pressing process and every single shirt that successfully withstands 60+ wash cycles directly affects your bottom line, profit margins, and business reputation in the competitive custom apparel market.
Tools and Materials You'll Need for Professional DTF Application
To achieve consistent, high-quality results with DTF transfers every single time, having the right tools and materials is absolutely essential for success. Using the wrong equipment, inferior materials, or makeshift alternatives can lead to frustrating problems like peeling edges, cracked designs, faded colors after washing, or inconsistent adhesion across your production run. Below is a comprehensive list of what every professional print shop, apparel brand, or custom merchandise business should prepare and have ready before starting the DTF transfer application process.
Heat Press Machine The Foundation of Quality
A professional-grade heat press machine is the absolute backbone of the DTF transfer application process and your most important investment. Unlike household clothing irons or makeshift heating solutions, a quality commercial heat press maintains stable, consistent heat distribution and even pressure across the entire platen surface, which is absolutely critical for achieving long-lasting, professional prints that maintain their quality wash after wash.
- Temperature Control Capability: Must consistently and accurately reach and maintain 290320�F (145160�C) without significant fluctuations throughout the pressing cycle.
- Adjustable Pressure Settings: Medium pressure range (3545 PSI) ensures proper adhesion without crushing fabric texture or causing ink spread issues.
- Size & Format Options: Larger heat press platens can accommodate gang sheets and roll formats efficiently, making them ideal for high-volume wholesale orders and production environments.
Teflon Sheet or Parchment Paper Essential Protection
Protective sheets are placed strategically between the transfer film and the heat press platen during application to prevent damage and ensure even results.
- Prevent designs from scorching, burning, or sticking permanently to the press platen surface.
- Promote even heat distribution across the entire design area, especially important for larger prints.
- Teflon sheets are reusable for thousands of presses and economical long-term; parchment paper is disposable but highly effective and readily available.
DTF Transfer Sheets, Gang Sheets, and Rolls
The quality of the film on which your design is printed is just as important as the heat press machine itself for achieving professional results.
| Format Type | Best Use Case | Production Volume |
|---|---|---|
| Single Transfers | Perfect for individual logos, small artwork designs, or custom text applications | Low to Medium |
| Gang Sheets | Multiple different designs arranged strategically on one sheet for maximum cost efficiency | Medium to High |
| Roll Format | Ideal for wholesale print shops with high-volume production requirements and automated systems | High Volume |
Compatible Fabrics Unlimited Versatility
One of the biggest competitive advantages of DTF printing technology is its remarkable fabric versatility. Unlike sublimation printing, which requires polyester content to work properly, DTF transfers adhere successfully to a wide range of textile materials:
- 100% Cotton: Produces the most vibrant colors and excellent wash durability, perfect for premium t-shirts and fashion apparel.
- Polyester & Blends: Perfect for sportswear, athletic uniforms, corporate apparel, and promotional merchandise applications.
- Specialty Fabrics: Denim, fleece, nylon, canvas, and even leather materials can be successfully decorated with the right press settings and techniques.
Professional Setup Summary
Every successful DTF transfer application workflow begins with the right equipment setup and quality materials. A reliable commercial heat press, protective sheets, quality transfer films, and suitable fabric selection ensure smooth production workflow, consistent professional-grade results, and minimal waste. Preparing these essential materials in advance saves valuable production time, dramatically reduces material waste, and significantly improves customer satisfaction and repeat business rates.
Preparing the Garment for Optimal Adhesion
Before you apply any DTF transfer to a garment, proper and thorough garment preparation is absolutely critical for success. Even the best transfer film combined with perfect heat press settings can fail completely if the fabric isn't prepped correctly using proper techniques. Taking the time to properly prepare your garments ensures significantly better adhesion, more vibrant color results, and exceptional long-lasting durability that survives multiple wash cycles without degradation.
Pre-Wash the Fabric (Optional but Highly Recommended)
While not always absolutely necessary for all applications, pre-washing garments can help effectively remove manufacturing residues, excess dye chemicals, sizing agents, or potential shrinkage issues that may negatively affect the final transfer quality and longevity.
- Wash without any fabric softeners, as they can leave an invisible coating on the fabric surface that seriously interferes with proper adhesion.
- Dry the garment completely and thoroughly before beginning the pressing process to eliminate all moisture.
- This step is particularly important for dark-colored garments, new wholesale blanks, and fabrics with heavy sizing or starch treatments.
Pre-Press to Remove Moisture and Wrinkles
Hidden moisture trapped in fabric fibers and uneven fabric surfaces are among the most common reasons why DTF transfers don't stick properly or fail prematurely. A quick but essential pre-press step effectively eliminates these risks and creates the perfect surface for transfer application.
Critical Pre-Press Protocol:
- Place the garment flat and smooth on the heat press platen surface.
- Close the press at 290310�F (145155�C) for 35 seconds with medium pressure.
- This removes wrinkles, flattens seams, and evaporates any hidden moisture that could cause steam pockets or poor adhesion.
- Pay special attention to areas with thick seams, pockets, or multiple fabric layers that trap more moisture.
Positioning the Transfer with Precision
Correct and precise placement of your DTF transfer is absolutely key for achieving professional results and maintaining consistent branding across all your products. Poor placement looks unprofessional and can result in customer returns or negative reviews.
- Fold the garment lightly along the vertical center to find the exact centerline for proper alignment.
- Use a ruler, T-square, or professional placement guide to align the design evenly and measure distances accurately.
- Standard placement for chest prints is typically 3-4 inches down from the collar seam, centered horizontally.
- Make sure the film is completely flat with no air bubbles, wrinkles, or creases that could affect heat distribution.
- For gang sheets or multiple logos on one garment, plan your spacing ahead of time to maintain uniform placement across multiple garments in the production run.
Protective Layer Setup
Before the main pressing cycle begins, have your Teflon sheet or parchment paper ready and positioned correctly. This essential protective layer ensures the film won't stick to the platen, prevents scorching or burning, and distributes heat evenly across the entire design area for consistent results.
Preparation = Success
By properly pre-washing when necessary, thoroughly pre-pressing to remove moisture and wrinkles, and carefully positioning your transfer with precision, you create the perfect foundation for successful pressing every single time. Skipping or rushing through garment preparation steps is one of the most common and costly mistakes in DTF printing, often resulting in poor adhesion, premature failure, or short-lived designs that damage your business reputation.
Heat Press Settings for DTF Transfers The Critical Success Factors
The success of every single DTF transfer application depends entirely on dialing in the correct heat press settings with precision and accuracy. Temperature, pressure, and pressing time work together synergistically to bond the ink and adhesive layer deep into the fibers of the garment for permanent adhesion. Using the wrong settingseven being off by just 10-15 degreescan lead to devastating results like peeling edges, cracking designs, fading colors after only a few washes, or complete transfer failure.
Recommended Temperature Range for Different Fabrics
The standard and most reliable temperature range for DTF transfers is between 290320�F (145160�C), but specific fabric types require fine-tuning within this range for optimal results.
| Fabric Type | Temperature (�F) | Temperature (�C) | Special Considerations |
|---|---|---|---|
| 100% Cotton | 310320�F | 154160�C | Can handle higher heat for maximum adhesion and vibrant colors |
| Polyester & Blends | 285300�F | 140149�C | Lower heat prevents scorching and fabric damage while maintaining quality |
| Special Fabrics (Nylon, Fleece) | 275290�F | 135143�C | Reduced heat to avoid melting, scorching, or fabric distortion |
| Denim & Canvas | 305320�F | 152160�C | Dense fabrics require higher heat and slightly longer pressing time |
Temperature Stability Warning:
A stable, calibrated heat press is absolutely crucial for consistent results. Temperature fluctuations of even 1015�F can dramatically impact adhesion quality, color vibrancy, and long-term durability. Always allow your heat press to fully heat up and stabilize before beginning production, and consider using a temperature gun to verify actual platen temperature periodically.
Pressure Settings Finding the Perfect Balance
Medium pressure is recommended and proven effective for the vast majority of DTF transfer printing jobs across different fabric types.
- Optimal Range: Typically 3545 PSI (34 bar) for most applications and fabric weights.
- Too Little Pressure: Results in weak bonding where the adhesive doesn't fully penetrate fabric fibers, causing the design to lift or peel after the first wash cycle.
- Too Much Pressure: Causes ink to spread beyond design boundaries, creates unwanted texture showing through the print, or crushes fabric pile on materials like fleece.
- Best Practice: Always test with a single garment before running large bulk production orders to verify your pressure setting is correct for that specific fabric type and weight.
Time Settings Precision Timing for Perfect Bonds
The optimal sweet spot for pressing duration is 815 seconds depending on specific fabric type, weight, and transfer film thickness.
- Cotton Garments: Often require closer to 1215 seconds for complete adhesive activation and deep fiber penetration.
- Polyester Blends: Can be successfully transferred in just 812 seconds due to synthetic fiber properties and lower heat requirements.
- Thick/Heavy Fabrics: May need up to 15 seconds or a second press cycle to ensure the heat fully penetrates all fabric layers.
- Critical Rule: Consistency is absolutely key. Avoid pressing too long, which can cause ink to blur, colors to fade, or adhesive to over-melt and spread beyond design boundaries.
Protective Sheet Use Never Skip This Step
Always place a Teflon sheet or parchment paper on top of the transfer film during every single pressing cycle. This essential protective layer not only protects the design from scorching or direct heat damage but also distributes heat evenly across the entire surface area, prevents the film from sticking to the platen, and creates a barrier that ensures consistent pressure distribution.
Settings Summary for Professional Results
Correct heat press settings for DTF transfers temperature (290320�F / 145160�C), medium pressure (3545 PSI), and pressing time (815 seconds) ensure vibrant, professional prints that maintain their quality and adhesion through 60+ wash cycles. Skipping calibration, guessing at settings, or inconsistently applying these values is the single most common reason why beginners and even experienced operators experience frustrating problems like peeling, cracking, or premature fading.
Applying the DTF Transfer The Critical Pressing Phase
Once your garment is properly prepped and your heat press is calibrated to the correct settings, it's time for the actual transfer applicationthe critical moment where the DTF transfer film bonds permanently to the fabric fibers, locking in the design for exceptional durability and vibrant color output. Precision, attention to detail, and proper technique during this step determine whether the final result looks professional and lasts for years or appears amateur and fails after a few washes.
Placing the Transfer on the Garment with Precision
- Lay the garment completely flat on the heat press platen, ensuring there are absolutely no folds, wrinkles, or bunched fabric underneath.
- Position the transfer film with the printed design facing down directly onto the garment surfacethe ink side must make contact with the fabric.
- Double-check alignment carefully (center chest placement, left chest positioning, sleeve location, etc.) using rulers, T-squares, or professional placement guides to achieve consistent positioning across multiple garments in production runs.
- For gang sheets with multiple designs, verify that all transfers are positioned correctly and none are overlapping seams, pockets, or other problem areas.
Protective Layer Application
Place a clean Teflon sheet or fresh parchment paper over the entire transfer area, ensuring complete coverage.
- This prevents the film carrier sheet from sticking to the upper platen or heating element.
- Promotes even heat distribution across the entire design, which is especially important for larger gang sheets or full-chest prints.
- Creates a protective barrier that prevents scorching, burning, or unwanted texture marks on the transfer surface.
Applying Heat and Pressure The Critical Moment
- Close the heat press firmly and apply the recommended temperature (290320�F / 145160�C), time (815 seconds), and medium pressure (3545 PSI) that you've tested and verified for this specific fabric type.
- Keep the press completely stable without shifting, moving, or adjusting the film during the entire application cycle.
- For larger designs, oversized prints, or gang sheets, a second overlapping press may be applied to ensure full edge-to-edge adhesion without gaps or weak spots.
- Listen for the press timer or use a reliable countdown to ensure consistent pressing time across every garment.
Hot Peel vs Cold Peel Choosing the Right Method
Depending on your specific film type and manufacturer recommendations, you will either peel the carrier film away immediately after pressing (hot peel) or wait for it to cool completely (cold peel). Understanding the difference and using the correct method for your film is essential for proper adhesion and finish quality.
| Peel Method | Timing | Finish Type | Best Applications |
|---|---|---|---|
| Hot Peel | Remove film instantly while still warm (within 5 seconds) | Smooth, glossy, vibrant finish | Cotton, blends, fast production workflows |
| Cold Peel | Wait 30-60 seconds for complete cooling before peeling | Soft, matte, vintage-style finish | Polyester, delicate fabrics, high-detail designs |
Peel Method Critical Guidelines:
- Always peel smoothly and consistently in one directionavoid jerky, stopping, or reversing motions that can lift or distort the design.
- If edges begin to lift during peeling, immediately stop, reposition the film, and repress for 35 seconds before attempting to peel again.
- Keep consistent, even pressure on the heat press to ensure the adhesive layer bonds uniformly across the entire design area.
- Always test both hot and cold peel methods with your specific film supplier's recommendations to determine which produces superior results for your production needs.
Post-Press Step for Maximum Durability
For maximum long-term durability and wash resistance, many professional print shops and apparel manufacturers perform a quick second press (sometimes called a "finishing press" or "cure press") immediately after peeling the carrier film.
- Duration: 24 seconds with protective Teflon sheet covering the design.
- Purpose: This final step locks the adhesive deeper into the fabric fibers, seals edges, and enhances wash resistance dramatically.
- Temperature: Same as original press temperature (around 300�F / 150�C).
- Pressure: Medium pressure, same as original application.
Application Success Summary
Successful DTF transfer application depends on precise placement and alignment, consistent protective sheet usage, correct press settings that have been tested and verified, and using the proper peel method (hot or cold) for your specific film type. Following these detailed steps ensures smooth adhesion without bubbles, complete edge-to-edge bonding without weak spots, and long-lasting prints that survive 60+ repeated washing cycles while maintaining vibrant colors and sharp detail.
Hot Peel vs Cold Peel Explained Making the Right Choice
One of the most frequently asked questions in professional DTF transfer application is whether to use a hot peel or a cold peel method for removing the carrier film. Both approaches have distinct advantages, specific use cases, and different final finish characteristics. Understanding the fundamental differences between these two methods ensures you achieve the exact finish quality, durability level, and production efficiency your specific project requires.
What is Hot Peel Transfer Method?
A hot peel transfer means the carrier film is removed immediately after pressing, while the transfer and adhesive are still hot and the adhesive is in its most pliable state.
- Produces a slightly glossy, vibrant finish with rich color saturation that makes designs pop visually.
- Significantly faster workflow for high-volume production environments where speed and efficiency are critical.
- Best suited for 100% cotton and cotton-blend fabrics where adhesion is naturally strong even without extended cooling time.
- Highly satisfying to peeloften used in social media videos and demonstrations due to the dramatic "peel reveal effect" that shows the finished design instantly.
- Ideal for print shops focused on rapid turnaround times and maximum daily production volume.
What is Cold Peel Transfer Method?
A cold peel transfer requires the garment, adhesive, and transfer to cool completely to room temperature before the carrier film is carefully removed.
- Creates a matte, soft-to-touch finish that feels more like traditional screen printing and less like a heat transfer.
- Offers enhanced durability and superior adhesion on delicate or heat-sensitive fabrics like polyester, nylon, or performance materials.
- Significantly reduces the risk of lifting edges, design distortion, or misalignment during the peeling process.
- Often preferred for highly detailed prints with sharp edges, fine lines, or intricate designs where precision is absolutely critical.
- Takes slightly longer due to cooling time (typically 30-60 seconds), but results in superior quality for premium applications.
When to Choose Hot Peel vs Cold Peel
| Scenario | Recommended Method | Reason |
|---|---|---|
| Bulk t-shirt orders with fast turnaround requirements | Hot Peel | Speed and workflow efficiency are priorities |
| Sports uniforms and performance apparel | Cold Peel | Enhanced durability and matte finish on synthetic fabrics |
| 100% cotton fashion apparel | Hot Peel | Strong natural adhesion, vibrant glossy finish |
| High-detail logo work with fine lines | Cold Peel | Prevents edge lifting and maintains sharp detail |
| Polyester or poly-blend garments | Cold Peel | Better adhesion and reduced risk of scorching |
| Social media content creation | Hot Peel | Satisfying peel reveal effect for videos |
Practical Tips for Peel Success:
- Always peel smoothly and consistently in one steady directionavoid jerky, stopping, or back-and-forth motions that can damage the design or lift edges.
- If edges begin to lift or show signs of poor adhesion during peeling, immediately stop the peeling process, carefully reposition the film, and repress for 35 seconds before attempting to peel again.
- Keep consistent, even pressure on the heat press throughout the entire pressing cycle to ensure the adhesive layer bonds uniformly across every part of the design area.
- Many professional shops stock both hot peel and cold peel film types to offer maximum flexibility for different customer requirements and fabric types.
- Always test both peel methods with a sample garment when starting a new project or working with a new fabric type to determine which produces superior results.
Peel Method Decision Summary
Hot peel transfers deliver exceptional speed and a glossy, vibrant look that's perfect for high-volume cotton production, while cold peel transfers offer matte finishes and superior long-term durability that's ideal for synthetic fabrics and premium applications. Choosing the right peel method for your specific garment type, fabric composition, and production goals ensures professional, consistent results in DTF printing every single time.
Post-Press Steps Ensuring Maximum Durability and Quality
Even after you've successfully applied and peeled your DTF transfer, the process isn't quite finished yet. Critical post-press steps are absolutely essential for ensuring maximum adhesion strength, exceptional wash resistance, and a premium finish quality that lasts through dozens of repeated use and washing cycles. Skipping these final important steps often leads to premature peeling around the edges, unexpected cracking after a few washes, or reduced overall durability that damages your business reputation and leads to customer complaints or returns.
Second Press for Extra Durability (Highly Recommended)
Many professional print shops and experienced operators strongly recommend performing a quick second press immediately after the carrier film has been removed. This additional step, sometimes called a "finishing press" or "cure press," significantly enhances the longevity and durability of your transfers.
- Time Duration: 24 seconds with protective Teflon sheet or parchment paper covering the design.
- Temperature Setting: Same as your original press temperature (typically around 300�F / 150�C).
- Pressure Level: Medium pressure, consistent with your original application settings.
- Purpose and Benefits: This finishing press helps the adhesive penetrate even deeper into the fabric fibers, seals all edges securely to prevent lifting, and dramatically increases wash resistanceoften extending garment life from 30-40 washes to 60+ washes without degradation.
Cooling Down the Garment Properly
Allow the garment to rest undisturbed for a few minutes (typically 2-5 minutes) before folding, stacking, packaging, or shipping to customers.
- Prevents any residual heat from causing unwanted ghosting, shadow marks, or imprint impressions on the design or fabric.
- Helps stabilize the adhesive layer fully and ensures the transfer sets properly into its final bonded state.
- Reduces the risk of stretching, distortion, or shifting while the adhesive is still warm and pliable.
- For high-volume production, create a cooling rack or designated cooling area where pressed garments can rest before packaging.
Quality Control: Inspecting Every Print
Before sending any garment to customers, storing it for inventory, or shipping it for fulfillment, perform a thorough quality inspection to catch any potential issues:
- Check carefully that all edges of the design are fully bonded to the fabric with absolutely no lifting, curling, or weak spots.
- Look for consistent color vibrancy across the entire print areacheck for fading, light spots, or uneven ink distribution.
- Lightly stretch the fabric in different directions to confirm the transfer flexes naturally with the garment without cracking, splitting, or showing stress lines.
- Inspect for any scorching, discoloration, texture marks, or other heat-related damage that could affect quality.
- Verify proper placement and alignment matches your production standards and customer specifications.
Optional Finish Effects for Different Looks
Some experienced shops experiment with different finishing techniques after the peel to achieve specific visual effects and textures:
| Desired Finish | Method to Achieve | Best Applications |
|---|---|---|
| Glossy Finish | Hot peel films + firm second press with smooth Teflon sheet | Vibrant sportswear, promotional items, bold graphics |
| Matte Finish | Cold peel films + lighter pressure on second press | Vintage-style apparel, fashion brands, soft-hand feel |
| Textured Finish | Specialty silicone sheets or textured protective papers | Unique effects, specialty products, premium apparel |
Post-Press Protocol Summary
A proper and thorough post-press routineincluding a second finishing press, adequate cooling time, and comprehensive quality inspectionensures DTF transfers bond securely deep into fabric fibers, resist washing and wear for 60+ cycles, and deliver the professional, premium look that customers expect and are willing to pay for. Skipping or rushing through these critical final steps is one of the fastest ways to reduce durability, increase return rates, and damage customer satisfaction and your business reputation.
Common Mistakes and How to Avoid Them
Even with high-quality films, premium inks, and professional equipment, many beginners and even experienced operators struggle with DTF transfer application because of small but critical mistakes that compound over time. These common errors often lead to significant wasted materials, unsatisfied or frustrated customers, reduced durability, and lower profitability. Understanding the most common problemsand more importantly, knowing exactly how to avoid themis absolutely essential for achieving consistent, professional results that build your business reputation.
Mistake #1: Using the Wrong Temperature Settings
Temperature errors are among the most common and costly mistakes in DTF printing, often causing catastrophic transfer failure.
Temperature Problems:
- Too Low (below 280�F): The adhesive doesn't melt or activate fully, causing edges to lift immediately or peel completely after the very first wash cycle.
- Too High (above 330�F): Colors appear burnt, scorched, or faded; the film may stick permanently to the platen; and fabric can become damaged or discolored.
- Solution: Always stay within the safe, tested range of 290320�F (145160�C) for most applications. Test each new batch of film, every new fabric type, and recalibrate your press regularly using a temperature gun for verification.
Mistake #2: Incorrect Pressure Application
Pressure mistakes are subtle but have dramatic effects on transfer quality and longevity.
- Too Light Pressure: Transfer sits on top of the fabric without proper penetration or bonding, leading to quick failure and peeling.
- Too Heavy Pressure: Ink spreads beyond design boundaries, creates unwanted texture showing through the print, or crushes fabric pile on materials like fleece or velour.
- Solution: Apply consistent medium pressure (3545 PSI) for the vast majority of garments. Adjust slightly for extremely thick or thin fabrics, but always test first.
Mistake #3: Skipping the Pre-Press Step
Many beginners rush into application without properly preparing the garment, leading to preventable failures.
- The Problem: Hidden moisture and wrinkles cause poor adhesion, steam pockets, uneven results, and premature failure.
- Solution: Always pre-press garments for 35 seconds at your working temperature to remove all moisture and flatten the fabric before applying any transfers.
- Impact: This simple 5-second step can increase your success rate from 70% to 95%+ and dramatically reduce waste and customer complaints.
Mistake #4: Rushing the Peel Process
Peeling at the wrong time or using incorrect technique is a major cause of transfer damage and failure.
- The Problem: Peeling too soon for cold peel films or waiting too long for hot peel films leads to partial lifts, distorted designs, or incomplete adhesion.
- Solution: Always follow the specific film type's instructions precisely. Practice and master both hot peel (immediate removal) and cold peel (wait for complete cooling) methods.
- Best Practice: Peel smoothly in one consistent direction without stopping, reversing, or jerking the film.
Mistake #5: Ignoring Post-Press Steps
Many beginners consider the job finished after peeling, missing critical durability-enhancing steps.
- The Problem: Skipping the second finishing press leaves transfers vulnerable to washing and reduces lifespan by 30-50%.
- Solution: Always perform a finishing press for 24 seconds after peeling to lock the adhesive deeper into fibers.
- ROI: This 4-second step can extend garment life from 30 washes to 60+ washesa dramatic improvement that builds customer loyalty.
Mistake #6: Poor Storage of Transfer Sheets
Improper storage degrades transfer quality before you even apply them to garments.
- The Problem: Leaving transfer sheets in humid, hot, or direct sunlight environments weakens the adhesive and degrades ink quality.
- Solution: Store DTF sheets flat (not rolled unless designed for it), in a cool, dry, climate-controlled place, inside sealed bags or airtight containers.
- Shelf Life: Properly stored transfers can last 6-12 months; improperly stored transfers can fail within weeks.
Mistake #7: Not Testing Before Production Runs
Jumping into large production orders without testing is a recipe for disaster and wasted materials.
- The Problem: Every heat press, fabric batch, and film type can behave slightly differentlyassumptions lead to failures.
- Solution: Always run 1-2 test presses with new films, fabrics, or equipment before committing to large production runs.
- Cost Savings: A $2 test garment can save you from ruining a $500 production order.
Mistake Prevention Summary
The biggest causes of failure in DTF transfer printing are incorrect heat settings, improper pressure, skipping preparation steps, rushing the peel process, and neglecting post-press care. By carefully controlling these critical factors, print shops dramatically reduce waste, ensure consistent professional results across all production runs, and deliver transfers that maintain quality and adhesion through dozens of washesbuilding customer trust and repeat business.
Washing and Care Instructions for Long-Lasting Prints
A perfect DTF transfer doesn't just rely on correct application techniques and proper heat press settingsit also depends heavily on how the garment is cared for and washed afterward by the end customer. By following the right washing and care guidelines and educating your customers about proper garment care, you can dramatically extend the life of your transfers, keeping prints vivid, vibrant, and durable through dozens of wash cycles while maintaining strong adhesion and preventing premature wear.
1. Wait Before First Wash (Critical Rule)
The adhesive layer needs adequate time to fully cure and bond completely into the fabric fibers after pressing.
- Mandatory Rule: Wait at least 24 hours (preferably 48 hours) after pressing before washing the garment for the first time.
- Why It Matters: Washing too soon can disrupt the curing process and significantly weaken the bond, leading to premature failure.
- Best Practice: Include this waiting period in your care instructions to customers and on packaging materials.
2. Wash Inside Out (Essential Protection)
Friction and abrasion from washing machine drums and other garments are among the top causes of cracked, faded, or damaged prints over time.
- Non-Negotiable Rule: Always turn garments inside out before placing them in the washing machine.
- Protection Benefit: This simple step protects the printed design from direct friction, rubbing, and contact with other items in the wash load.
- Lifespan Extension: Inside-out washing can extend print life by 40-60% compared to washing right-side out.
3. Temperature Control (Critical for Longevity)
High water temperature weakens adhesives, fades inks, and accelerates garment wear significantly.
- Optimal Temperature: Wash at 30�C (86�F) or cold water settings for best longevity and color retention.
- Maximum Temperature: Never exceed 40�C (104�F) for DTF-printed garments.
- Avoid: Hot water cycles completelythey can cause adhesive breakdown and significant color fading within just a few washes.
4. Avoid Harsh Chemicals and Additives
Bleach, strong detergents, and chemical additives can damage both the ink layer and fabric fibers, leading to premature deterioration.
- Use: Mild, pH-neutral detergent designed for colored fabrics.
- Avoid Completely: Bleach, chlorine-based products, harsh stain removers, and fabric softeners (which leave residue that interferes with adhesion over time).
- Eco-Friendly Options: Gentle, plant-based detergents work exceptionally well with DTF prints.
5. Drying Methods (Major Impact on Durability)
Tumble dryers often apply excessive heat and mechanical stress, shrinking garments and cracking prints prematurely.
| Drying Method | Impact on DTF Print | Recommendation |
|---|---|---|
| Air Dry (Hang or Flat) | Best for longevityno heat damage, no mechanical stress | Highly Recommended |
| Tumble Dry Low Heat | Acceptable with cautionuse lowest heat setting | Acceptable if Necessary |
| Tumble Dry High Heat | Causes cracking, fading, and adhesive breakdown | Never Use |
6. Ironing Precautions (Protect Your Investment)
Ironing directly on DTF transfers can melt the adhesive, distort the design, and permanently ruin the print.
- Never: Iron directly over any part of a DTF-printed designthis will cause immediate, irreversible damage.
- If Ironing is Necessary: Turn the garment inside out and iron from the reverse side, or place a protective cloth or Teflon sheet between the iron and the design.
- Best Practice: Use a steamer instead of an iron when possible to remove wrinkles without direct contact.
7. Long-Term Storage (Preserve Quality)
Storing garments in improper conditions can cause deterioration even without washing or wear.
- Environment: Store in a cool, dry, climate-controlled environment away from direct sunlight, humidity, and heat sources.
- Folding: Fold garments with tissue paper between layers to prevent prints from sticking together.
- Avoid: Storing in damp basements, hot attics, or direct sunlight which can fade colors and degrade materials.
Care Instructions Summary for Maximum Lifespan
Proper aftercare is absolutely essential for extending the lifespan of DTF printed garments to their maximum potential. Wash inside out, use cold water (30�C/86�F), avoid bleach and harsh chemicals, air dry when possible, and never iron directly on prints. With the correct maintenance and care, professionally applied DTF prints can easily survive 60+ wash cycles while maintaining their vivid colors, strong adhesion, and sharp detailensuring customer satisfaction and building long-term brand loyalty.
Final Tips for Professional Results Every Time
Mastering DTF transfers goes far beyond simply applying heat and pressure to a garment. Professional, consistent results require careful attention to detail, commitment to quality control, and awareness of the small adjustments and techniques that make a big difference in final output quality. These final expert tips ensure your prints always look sharp, maintain exceptional durability, and meet or exceed the high standards that professional print shops and apparel brands are expected to deliver.
1. Always Pre-Press Every Garment (No Exceptions)
Hidden moisture and wrinkles interfere significantly with proper adhesion and create weak spots in your transfers.
- Non-Negotiable Rule: Pre-press all garments for 25 seconds at your working temperature to create a completely flat, dry surface before applying any transfers.
- Impact: This simple step prevents steam pockets, ensures even heat distribution, and can improve your success rate by 20-30%.
2. Maintain a Clean Heat Press (Preventive Maintenance)
Residue buildup on the press platen can cause uneven application, hot spots, and inconsistent results over time.
- Daily Cleaning: Wipe down the platen surface regularly with a clean cloth to ensure even pressure and consistent temperature distribution.
- Deep Cleaning: Use specialized heat press cleaning solutions weekly to remove stubborn adhesive residue and maintain optimal performance.
- Inspection: Check Teflon sheets regularly and replace them when they show signs of wear, scorching, or adhesive buildup.
3. Use Protective Sheets Without Exception
Direct contact between transfer film and the heat platen can damage inks, cause sticking, and create uneven results.
- Always Use: Place a Teflon sheet or parchment paper over every single transfer during pressingnever skip this critical step.
- Benefits: Protects against scorching, distributes heat evenly, prevents sticking, and extends the life of your equipment.
4. Test Before Every Large Production Run
Every heat press machine behaves slightly differently, and fabric batches can vary in composition and characteristics.
- Mandatory Testing: Run a single test press with each new batch of transfers, different fabric type, or after any equipment maintenance.
- What to Test: Verify temperature accuracy, check adhesion quality, test peel method, and perform a wash test if time permits.
- Cost-Benefit: A $2 test garment can save you from ruining a $500+ production orderthe ROI is enormous.
5. Stay Consistent With Settings (Document Everything)
Changing settings too frequently or failing to document successful parameters leads to inconsistent results and wasted time troubleshooting.
- Create a Settings Database: Document your proven temperature, pressure, and time settings for each fabric type and transfer film combination.
- Consistency is Key: Once you find settings that work perfectly, stick to those exact numbers and resist the temptation to "experiment" during production.
- Training Tool: These documented settings also make training new employees faster and more reliable.
6. Educate Your Customers About Care (Build Loyalty)
If you're selling printed garments to end customers, aftercare knowledge builds trust, reduces returns, and creates repeat business.
- Include Care Instructions: Provide printed care tags or instruction cards with each order so customers know exactly how to protect their investment.
- Key Points to Cover: Wash inside out, use cold water, avoid bleach, air dry when possible, never iron directly on print.
- Marketing Benefit: Educated customers experience better results, leading to positive reviews and word-of-mouth referrals.
7. Invest in Quality Materials (False Economy to Cut Corners)
Using cheap transfer films, inferior inks, or low-quality garments to save money almost always backfires with poor results and customer complaints.
- Transfer Film Quality: Premium films produce better colors, stronger adhesion, and longer-lasting resultsworth every penny.
- Garment Quality: Higher-quality blanks (better cotton, tighter weave) produce better prints and happier customers.
- Long-Term ROI: One failed order from cheap materials can cost more than the savings from 100 successful orders.
8. Regular Equipment Calibration (Prevent Drift)
Heat press temperature and pressure settings can drift over time due to wear, environmental changes, or component aging.
- Monthly Calibration: Use a temperature gun to verify actual platen temperature matches your display reading.
- Pressure Check: Verify pressure settings remain consistent using test strips or pressure-sensitive paper.
- Preventive Maintenance: Schedule regular professional servicing to catch problems before they affect production quality.
Professional Excellence Summary
Consistency, cleanliness, preparation, testing, and documentation are the foundational keys to achieving professional-level DTF printing results every single time. From pre-pressing every garment to documenting proven settings, educating customers, and maintaining equipment, these expert practices ensure flawless application, exceptional durability, and long-lasting quality across all print jobsbuilding a reputation for excellence that drives business growth and customer loyalty.
Conclusion: Master DTF Transfers for Business Success
Recap of the Step-by-Step Process
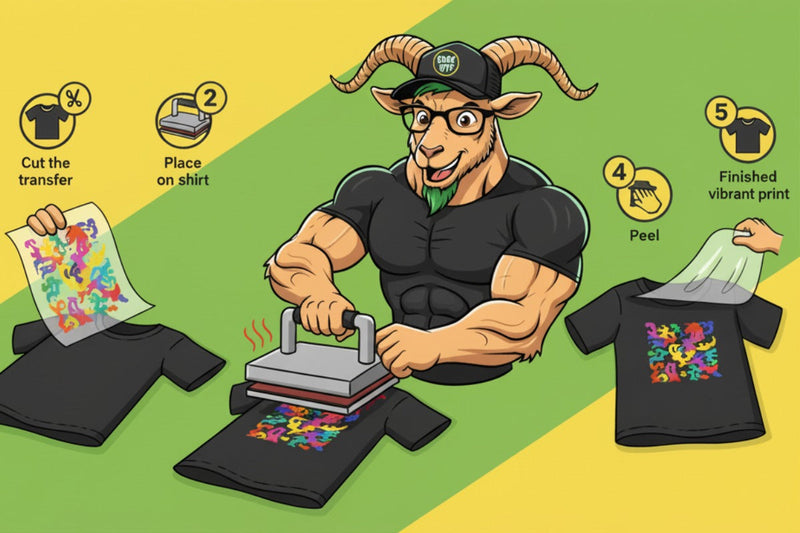
Applying DTF transfers becomes straightforward and reliable once you follow the correct process with consistency and precision:
- Step 1: Prepare your garment thoroughly with a quick pre-press to eliminate all moisture and wrinkles.
- Step 2: Set the right temperature (290320�F), time (815 seconds), and pressure (3545 PSI) according to your specific fabric type.
- Step 3: Place and press the transfer using consistent, even pressure and proper protective sheets.
- Step 4: Use the correct peel method (hot or cold) immediately for flawless adhesion and professional finish.
- Step 5: Perform a finishing press and follow proper aftercare instructions to maximize durability and longevity.
By mastering these essential steps and following the detailed guidelines in this comprehensive guide, you ensure that every single print comes out vibrant, durable, and professionalbuilding customer satisfaction and driving repeat business.
Why GOAT DTF Transfers Deliver Premium Results
Not all DTF transfers are created equal in quality, performance, or reliability. At GOAT DTF, we pride ourselves on being the Greatest of All Time in DTF printing technology and customer service:
- Premium Film and Inks: We use only the highest-quality materials that guarantee vivid colors, sharp details, and exceptional wash durability.
- Hot Peel Technology: Our transfers feature smooth, fast hot peel application without wasted time or complicated procedures.
- Factory-Direct Wholesale Pricing: You get the absolute best value without middlemen, distributors, or unnecessary markups eating into your profit margins.
- Durability Tested: Our transfers are rigorously tested over 60+ wash cycles, ensuring long-lasting results that keep your customers happy and coming back.
- Same-Day Shipping: Fast fulfillment and dedicated B2B support help your business scale quickly without inventory delays.
- Expert Support: Our team of DTF printing experts provides guidance, troubleshooting, and technical support to ensure your success.
When you choose GOAT DTF, you're not just buying transfersyou're investing in quality, speed, reliability, and a partnership that gives your print shop a significant competitive edge in the growing custom apparel market. Our commitment to excellence ensures that every transfer you apply reflects the professional standards your business is built on.
Ready to Elevate Your Printing Business?
Experience the GOAT DTF difference with premium transfers that deliver professional results every time. Join thousands of successful print shops and apparel brands who trust GOAT DTF for their custom printing needs.